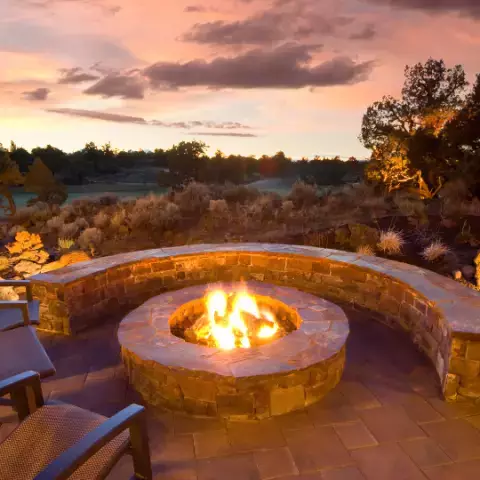
How to Build a Backyard Fire Pit: A Step-by-Step Guide
A backyard fire pit can be a great addition to any outdoor living space, providing a cozy gathering place for family and friends on chilly evenings. It is also a great DIY project that can be completed on a weekend with just a few basic tools and materials.
Before you start building your fire pit, it is important to consider safety first. Choose a location that is away from any structures or flammable materials, and ensure that it complies with local regulations. It is also important to ensure that the area you have chosen is clear of any underground utilities such as gas lines or electrical wiring.
Once you have chosen a safe location for your fire pit, the next step is to prepare the site and build the fire pit. Depending on your choice of materials, this can involve laying bricks or pavers, installing a fire pit kit, and filling the pit with fire pit material.
Following these steps will help you create a safe and enjoyable DIY backyard fire pit that you can enjoy for years to come. With a little bit of effort and creativity, you can create a cozy gathering place for family and friends that will be the envy of the neighborhood.
Step 1: Choose Your Location
When selecting a location for your fire pit, it is important to consider safety first. Make sure that the location is away from any structures or flammable materials, and that it complies with local regulations. You can check with your local government or fire department to find out if there are any specific regulations that you need to follow.
Additionally, you want to ensure that the area you have chosen is clear of any underground utilities such as gas lines or electrical wiring. Contact your local utility company to have them mark any underground lines before digging.
Step 2: Prepare the Site
Once you have chosen the location for your fire pit, you need to prepare the site. Start by removing any grass or vegetation from the area, and make sure the surface is level. This will provide a stable foundation for your fire pit.
Use a shovel to dig a shallow hole about 6 inches deep and wide enough to accommodate your fire pit. A shallow hole is best, as it will allow for good drainage and prevent water from pooling in the fire pit. Use a level to ensure that the surface is even, and make any necessary adjustments.
Step 3: Install the Base Layer
If you are using a fire pit kit, follow the manufacturer's instructions to install the base layer. This typically involves placing a metal ring or frame on the ground and filling it with gravel or sand to create a stable base.
If you are building a fire pit with bricks or pavers, spread a layer of sand or gravel on the bottom of the hole. This will help with drainage and provide a stable base for the fire pit. Use a rubber mallet to tamp down the sand or gravel and create an even surface.
Step 4: Build the Walls
If you are using a fire pit kit, assemble the walls according to the manufacturer's instructions. This typically involves stacking metal or stone panels to create a circular wall around the base layer.
If you are building a fire pit with bricks or pavers, arrange them in a circle around the base layer, leaving a small gap between each brick or paver. Use a level to ensure that the bricks or pavers are even, and adjust as necessary.
Step 5: Lay the Second Layer
If you are using a fire pit kit, follow the manufacturer's instructions to lay the second layer. This typically involves stacking additional panels on top of the first layer to create a taller wall.
If you are building a fire pit with bricks or pavers, lay the second layer in a staggered pattern, with the joints between the bricks or pavers offset from the joints in the first layer. Use a level to ensure that the bricks or pavers are even, and adjust as necessary.
Step 6: Finish the Wall
If you are using a fire pit kit, follow the manufacturer's instructions to finish the wall. This typically involves adding a top ring or cap to the wall for a finished look.
If you are building a fire pit with bricks or pavers, continue laying additional layers until the wall reaches the desired height. Use a trowel to apply mortar to the joints between the bricks or pavers, and smooth it out. This will help to hold the bricks or pavers in place and create a solid wall.
Step 7: Add the Fire Ring
If you are using a fire pit kit, follow the manufacturer's instructions to install the fire ring. This typically involves placing a metal fire ring inside the wall and securing it in place.
If you are building a fire pit with bricks or pavers, place a metal fire ring in the center of the pit. The fire ring will help to contain the fire and prevent it from spreading outside the fire pit. Make sure the fire ring is level and centered in the pit.
Step 8: Fill with Fire Pit Material
Once the fire ring is installed, fill the pit with fire pit material. This can be anything from lava rock to fire glass to wood chips. The type of material you choose will depend on your personal preference and the look you are trying to achieve.
If you plan to burn wood in your fire pit, make sure to use only dry, seasoned wood that has been cut to the appropriate length for your fire pit. Do not use wood that has been painted, pressure-treated, or otherwise treated with chemicals, as this can release harmful fumes when burned.
Step 9: Enjoy Your Fire Pit
With the fire pit complete, you are ready to enjoy it! Gather some chairs or benches around the fire pit and invite some friends and family over for a cozy evening by the fire. Remember to follow proper safety precautions, such as keeping a bucket of water nearby and never leaving the fire unattended.
It is also important to check with your local government or fire department for any regulations or restrictions on using a fire pit, such as burn bans or restrictions on burning certain materials.
Maintaining Your Fire Pit
To keep your fire pit in good condition, it is important to clean it regularly. Remove any ashes and debris from the fire pit after each use, and sweep or hose it down as necessary. If you notice any damage to the fire pit, such as cracks or loose bricks, repair it promptly to prevent further damage.
FAQs
- Do I need a permit to build a fire pit in my backyard?
Answer: The need for a permit may vary depending on your local regulations. It is important to check with your local government or fire department for any regulations or restrictions on using a fire pit, such as burn bans or restrictions on burning certain materials.
- What materials do I need to build a fire pit?
Answer: The materials needed will depend on the type of fire pit you want to build. Some common materials include bricks, pavers, fire pit kits, fire rings, and fire pit materials such as lava rock, fire glass, or wood chips.
- How much does it cost to build a fire pit?
Answer: The cost of building a fire pit will depend on the materials you choose and the size of the fire pit. A basic DIY fire pit can cost as little as $50, while a more elaborate fire pit can cost several hundred dollars.
- Can I burn wood in my fire pit?
Answer: Yes, you can burn wood in your fire pit. However, it is important to use only dry, seasoned wood that has been cut to the appropriate length for your fire pit. Do not use wood that has been painted, pressure-treated, or otherwise treated with chemicals, as this can release harmful fumes when burned.
- How do I maintain my fire pit?
Answer: To keep your fire pit in good condition, it is important to clean it regularly. Remove any ashes and debris from the fire pit after each use, and sweep or hose it down as necessary. If you notice any damage to the fire pit, such as cracks or loose bricks, repair it promptly to prevent further damage.
Following these steps will help you create a safe and enjoyable DIY backyard fire pit that you can enjoy for years to come.